We now have a new method to display calendar events that span multiple days. Use this feature to schedule vacations and easily spot overlaps.
Here are the instructions to setup a custom app for your vacation calendar. Skip these steps if you have already setup your custom app.
- To create a Vacation Calendar app, click on the Applications tab on the left menu
- On the Applications page, select the Vacation Request template and then click on “Add to TeamGram”
This creates a simple form-based app where your team members can fill in and send vacation request forms to their managers for approval. Once a form is sent for approval, it may not be edited by the submitter.
You can click on the “Application settings” button at the top to rename your app or make changes in the fields and the options available to users. If you do not require approvals in your vacation forms, you can also uncheck the “Requires approval” box in your app settings.
There are only 3 fields that you must not delete:
- Employee: This field shows who is taking the vacation
- Start date: This shows when this person’s vacation begins
- End date: This shows when this person’s vacation ends
Once you complete the changes and finalize your app, you are ready to enter some data. Fill in a few vacation requests.
The default display for custom apps is a list view, but you can click on the Calendar button at the top to display them in a calendar format.
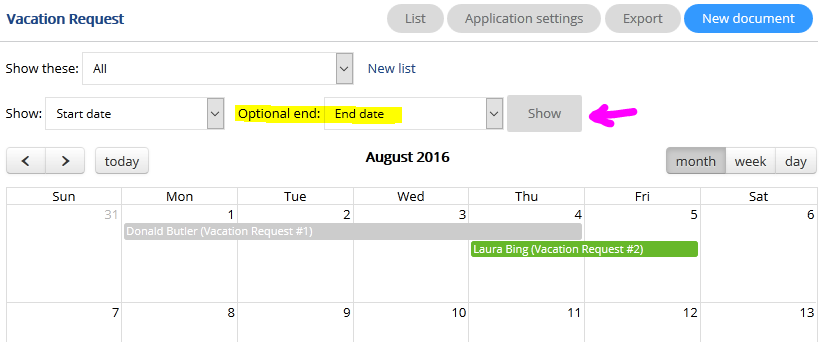
The calendar initially displays all events by the first date field in them, so you will only see the first day of each vacation. To see the whole duration of each vacation request nicely laid out in the calendar, make sure you specify the End date as the “optional end” field and press the Show button. Different colors show different approval states.
The calendar settings are persistent, so the next time you click on the calendar button on the same browser, you will not need to change these settings.
