TeamGram includes easy to use advanced reporting features for quick access to the details of your sales performance.
In terms of reporting, salespeople may ask:
- What’s the status of my quotes, sorted by customer, sales rep, or specific dates?
- How many leads are processed by each salesperson last month, and can it be sorted by lead status?
- What’s the status of all sales, sorted by salesperson, probability, and stage?
Start managing your sales by asking the right questions. To help, TeamGram allows you to create custom sales reports that are easy to access and simple to read.
How TeamGram Reports Work
In TeamGram, every section (leads, sales, proposals, activities, and more) includes detailed filtering options to create customized reports:
Criteria Selection: After choosing the section to create your reports on, you can begin filtering criteria among the options provided, based on your reporting needs.
Saving a Report: After setting your criteria and generating your report, save it to give each report a unique name for easy access later on.
Settings: Changes to reports can be made on the fly, such as adjusting filtering options, adding or deleting criteria, or changing dates. Start by clicking on the Settings link to make the necessary changes.
Giving Access to Others: Reports are initially created for your access only. You may also open up certain reports to be accessible to your teammates, and TeamGram gives you the option to share those as well. After all, isn’t sharing information one of the most prominent benefits of CRMs?
Export to Excel: All reports are ready to be exported to Excel with a single click. By exporting your data in Excel format, you can create even more customized reports, taking advantage of pivot tables and graphs in Excel.
How to Create a Report
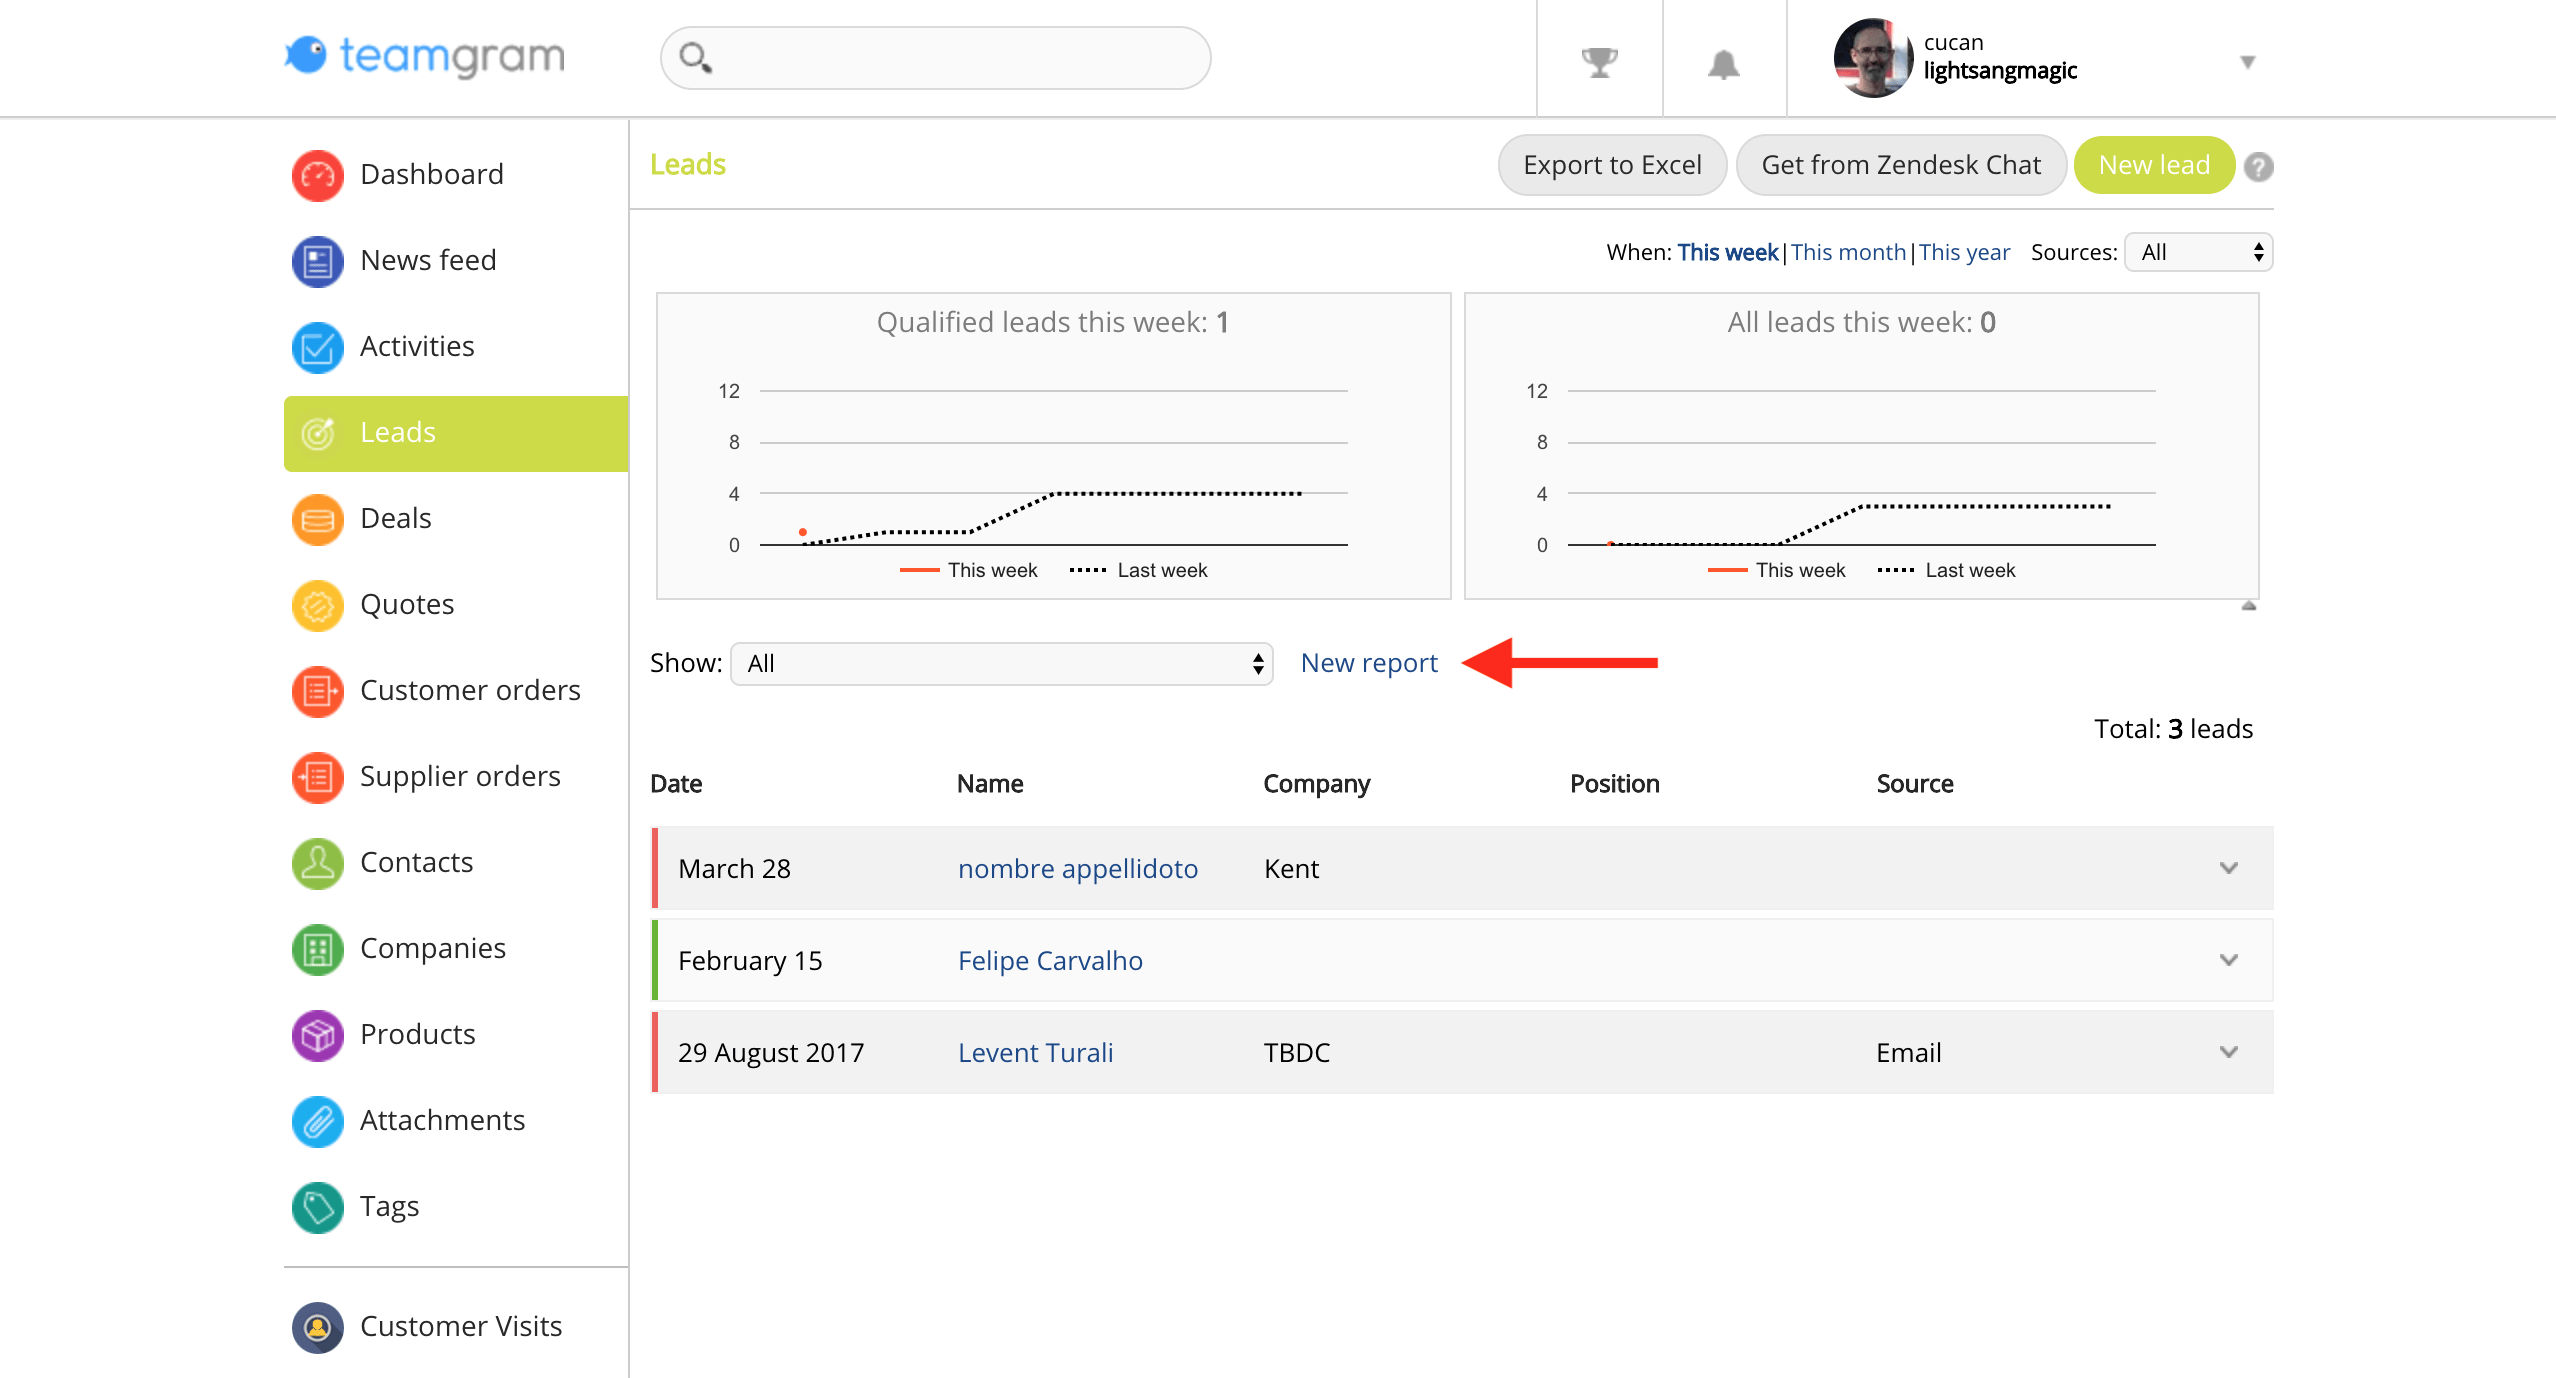
Start by selecting any section in the left menu, then click New Report. For example, to create a report on Leads, click Leads, then click New Report on the subsequent page.
Setting Reporting Criteria
When marking the desired criteria fields, your selections will appear under the Selected Criteria area on the right side of the page. You can review your selections and uncheck those you don’t have interest in. TeamGram Reports offer different filtering options for each section for you to explore a wide assortment of data and easily create any custom reports you may need.

By clicking the Apply button, you can instantly view your report based on your selections.
Saving a Report
Creating a report that you’d like to access at a later time will need to be saved. Reports that have not been saved yet will appear under “Unsaved Report”. If you leave the page without saving, you’ll have to repeat the selection process to get to the same report later.
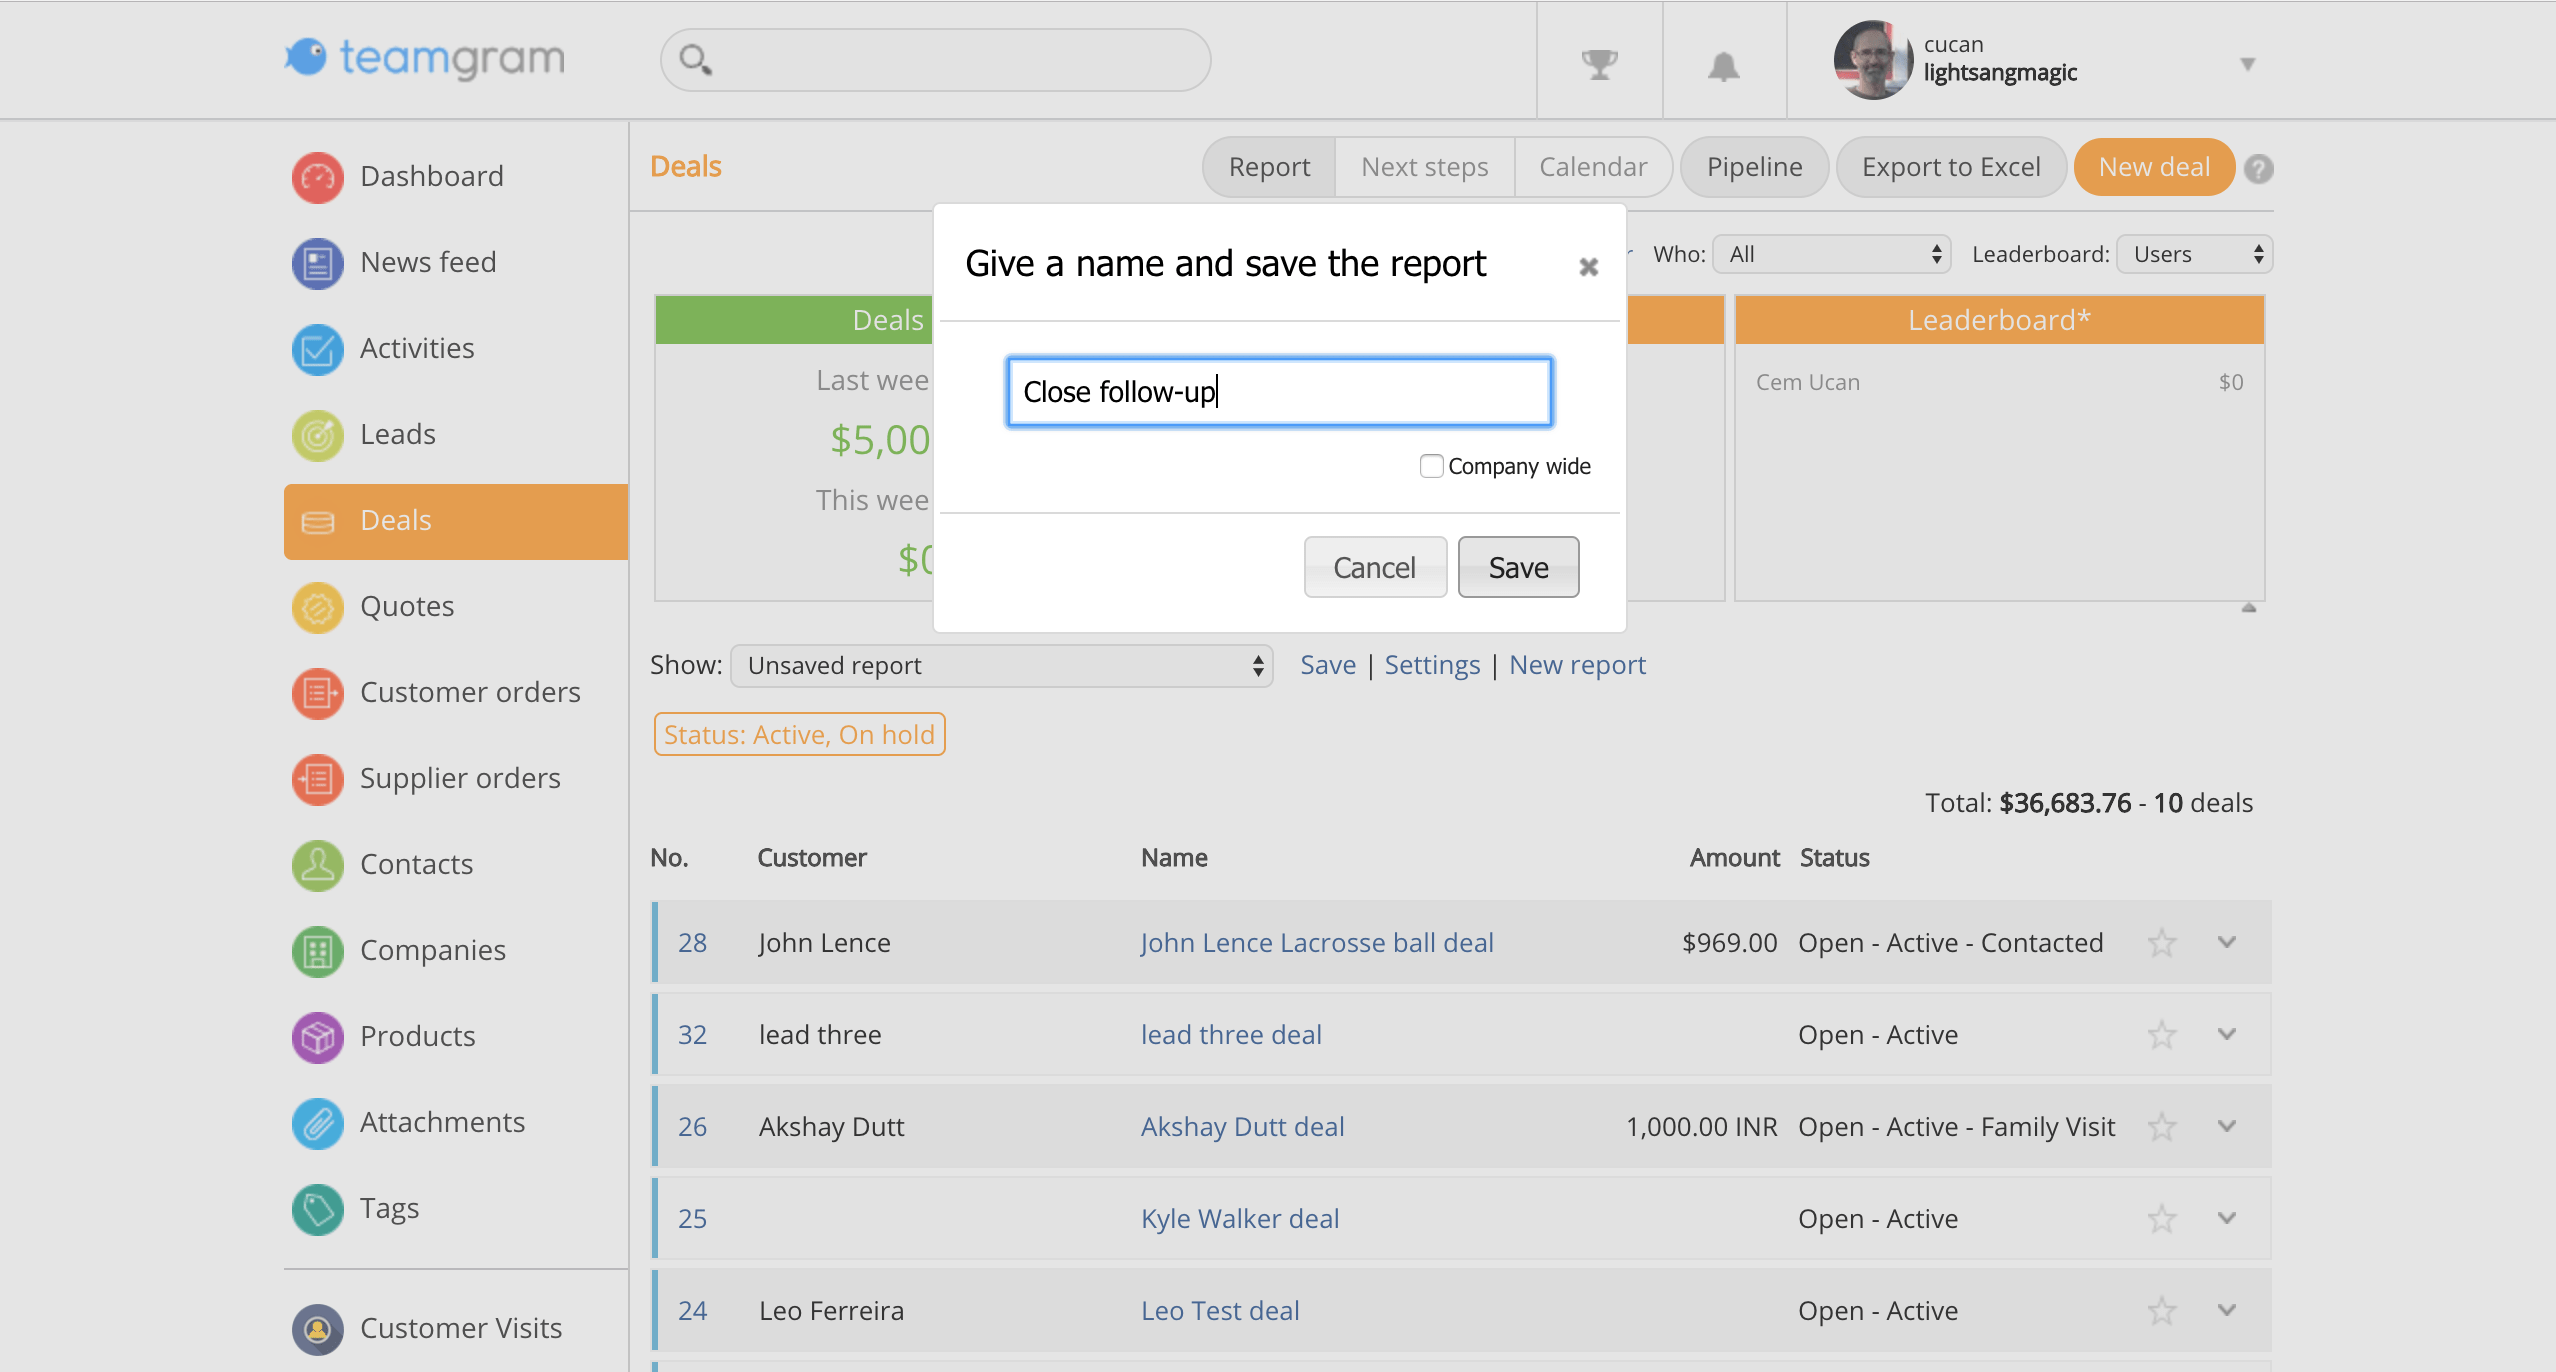
To save your report, simply click on “Save”, and then give it a name that relates to the data and the results. It is possible to save the reports you create in TeamGram for your personal use, or for use by your entire organization. For reports that will be shared with your colleagues, you can checkmark the “Company-wide” option.
After you have saved your report, ensure sure you see the name of your report in the drop-down menu.

Your report is ready for your quick and easy access.
Reporting Tips
Let’s explore a few tips that will help you get the most out of TeamGram Reports:
- Tags: Tags are important segmentation tools in TeamGram. Tags appear in the reporting filters and can segment any information. For example, if you have labelled your most loyal customers as #loyalcustomers, you can include this field in your TeamGram Report and segment the information in any way you want.
- Rapid Access: Save reports that you’ll often use. Quickly access your reports from the dropdown menu, without having to recreate it over and over again.
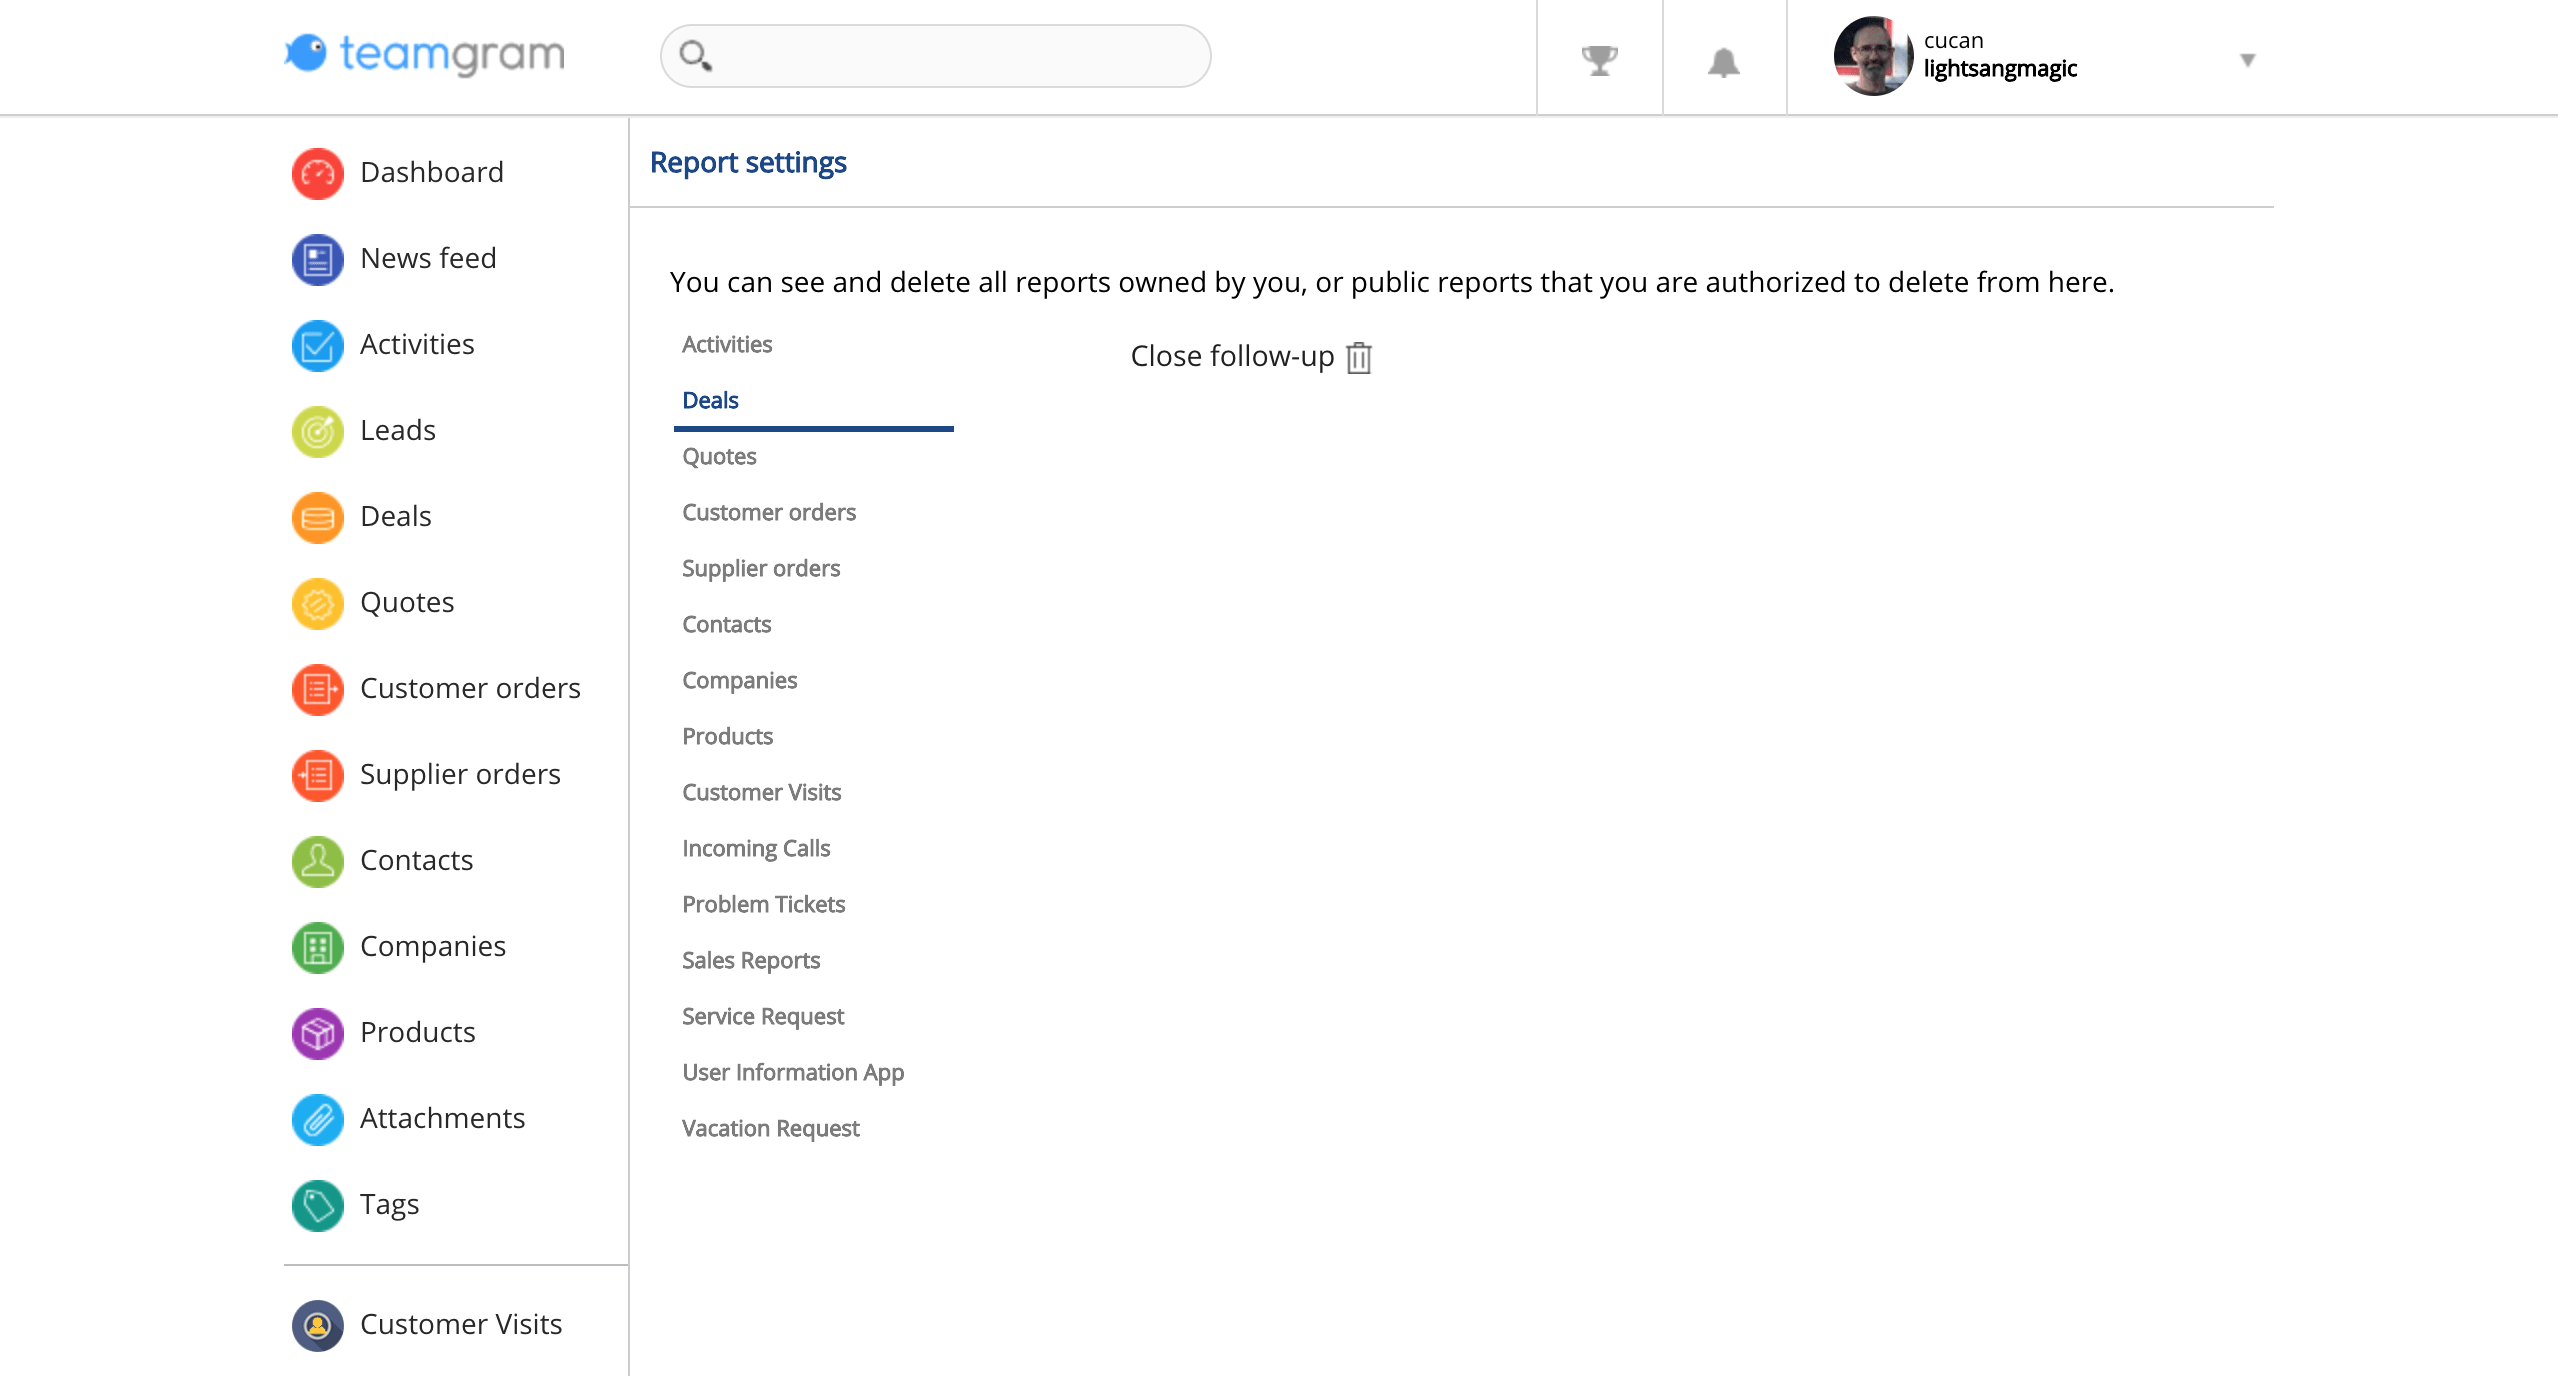
- Report Management: You can view and manage reports created by you for each section. To start, click Control Panel in the left sidebar and click the Report settings link.